

Stifled - Level Design
- chen wei ren
- Jun 13, 2019
- 3 min read
Updated: Jul 3, 2019
Today we will explore how a level is created in Stifled!

Quick description of the level
House (1975) is the fourth level of the game and is the house of the protagonist. The house is slightly run down and messy. This is to reflect the lack of maintenance due to the break down of the relationship between the protagonist and his wife.
Plan
The main goals of the level are:
Let the player understand the mental state of the wife
Let the player explores the house to find out what has happened between the couple
List of rooms and their purposes
Master bedroom
The room will be locked until the player explores the whole house. The wife has locked herself in the room. The room will provide insight into the mental state of the wife.
Spare room
Once served as the room for the baby but has since been abandoned.
Study
Served as the working area for the protagonist. Provide insight into the world of the protagonist.
Dining room
The dining table will have leftover and is filled with scattered papers (receipt, bills).
Kitchen
Dirty. Basin filled with unwashed plates. Show a couple surviving on canned food.
Staircase
Connect first and second floor
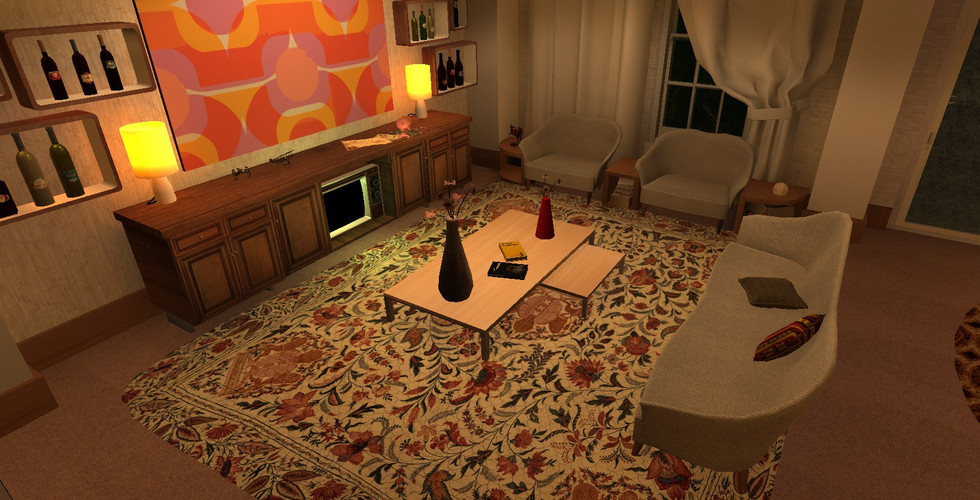
Living room
A TV with static. A pail collecting water from leaking ceiling.
Garden
Dark (Night time). Raining.
Garage
Car (Appeared in the previous 2 levels). Connect the garden to the foyer. A radio with weather forecast announcement.
Foyer
Front door (locked). A desk with a telephone. A voice mail from the orphanage will be available from the telephone.
Basement
A wine cellar room turned into a temporary bedroom to show the strained relationship between the couple. The protagonist will wake up from here at the start of the level.
Library (merged with study)
Main Events
Glimpses of wife
Wife walking past the basement tunnel
Wife's shadow outside the unlocked master bedroom
Footstep at garage
Voicemail
Call from orphanage
Reveal of mysteries in master bedroom
Draw open curtain in bathroom
Bedroom turning red
Protagonist's thought
Poem and journals in the computer
Getting stuck in the study
Looping back if player exits the study without fulfilling the exit condition (Open the locked safe)
Unlocking the safe (figuring out the password, which is set to a number significant to the protagonist)

I will start by researching on real life house layouts and adjust them to fit the size and flow of the level in my mind.
Prototype
The first stage is to translate the design on paper to Unity. With the layout on hand, I started building the first room using primitive boxes in Unity. To ensure that the scaling is right, I would then add the player controller so that I can see the scale of the room in real-time. The main goal at prototype stage is to build fast and test early as any changes to level design will have serious implications down the road. Once the whole house is blocked out, I will proceed to have my teammates to test out. The main focuses of the test will be on the scale, the flow of movement in the house and whether the location of the rooms makes sense. I also slapped some simple textures to the wall, floor and furniture to help with visual recognition.

Alpha
Once the level design is finalized, I will move to Alpha stage. The main focuses of Alpha are on scripted events and basic dressing. Scripted events are done through the custom Trigger Manager provided by the programmers. If I need some additional behavior, I would usually just "DIY" some custom scripts. I think it is better to know exactly what I need by implementing it first before sending a request to the programmer. Next will be basic dressing. It involves replacing the primitive furniture with temporary proper looking ones. The main objective is to ensure testers can get the right sense of the space. I will also create some custom art assets that I feel is important in portraying the story (eg. paintings, books). Some sound assets are added to set the atmosphere and to ensure testers can get important audio feedback (eg. thunder, raining, footstep).

Moving on to the next phase of Alpha will be lighting. Since this is a horror game, lighting will be essential prior to testing. The crucial things to take note while doing lighting is the atmosphere and leading. Performance is not the key at Alpha stage so all the lights I used are dynamic.

Beta
Once alpha build is sufficiently tested, we will move to 3DS Max to create the final mesh of the house.


Optimization
Shadows can be expensive to render so by default, no objects will cast shadow. A script is then added to each object that needs to cast shadow. The script will come with a quality setting to determine when the shadow should be cast.


Comments